Four-patch Friday on Day 10 of Time to Quilt

17 Apr My original quilt with no black in the blocks and my revised version with some black - it's still a work-in-progress

Fellow Quilters,Time to Quilt logo

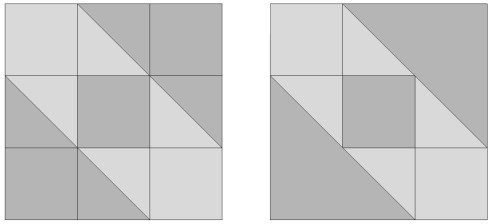
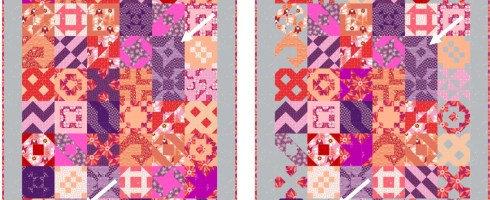
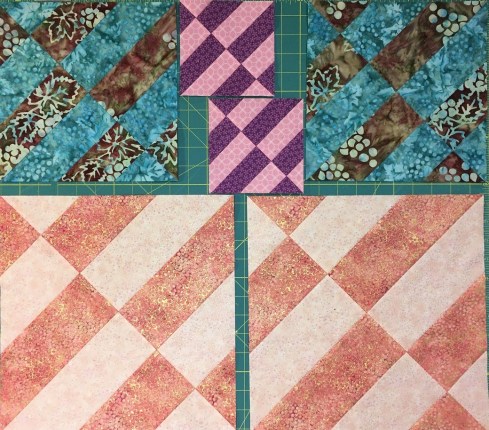
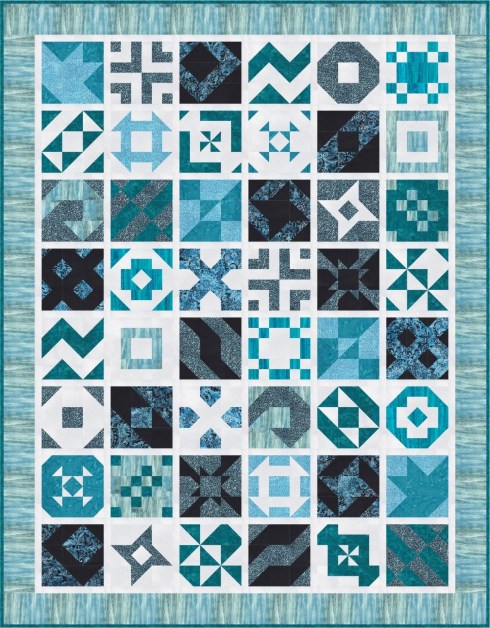
Welcome to Day 10 of the Time to Quilt quilt-along!  Last night I finally found some time to tweak my quilt design for the super-size Shimmer option.  Shimmer is one of my all-time favorite Northcott collections so I was excited to use it for the quilt-along however, when I colored the quilt based on the template posted on the Northcott Facebook page a few days ago, the quilt didn’t look the way I expected.  Does that ever happen to you?  You make all the blocks for a quilt using that perfect selection of fabrics, then sew them into the quilt and…hmmm…ho-hum…another UFO.  As I mentioned on Day 1, my pieces of Shimmer might be a bit small to get all the required pieces for the blocks, so I was considering adding some solid black from Northcott’s ColorWorks.  I’m not changing any of the blocks that are already completed so I randomly recolored a few of the upcoming blocks.  Here is my original quilt design and the revised one with some black thrown into the mix.

My original quilt with no black in the blocks and my revised version with some black - it's still a work-in-progress

My original quilt with no black in the blocks and my revised version with some black – it’s still a work-in-progress

Now, the blocks are not in their final placement – it would take waaaay too long to move them around in EQ – but I feel pretty confident that I’ve got a good mix now.  The addition of black background to some of them adds interest to the quilt.  So, what does this mean for your quilt?  If you are using sashing, you may want to replace one of the fabrics on some of the remaining blocks with some of your sashing fabric – or not!  The choice is yours.  We all have our own comfort level with how busy we want our quilts to look.  My Midsommar make-it-mini will look busier because there is no sashing to tone it down – I’m okay with that.  Some modern quilts ARE busy.

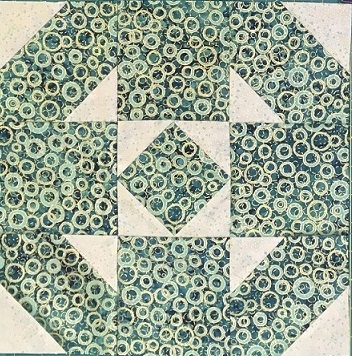
Block 10

Block 10

For Block 10 I decided not to make any changes in the original pattern posted on Northcott’s, Banyan’s and FIGO’s Facebook/Instagram pages/feeds.  That’s 3 days in a row with no changes!  I could have eliminated 2 small seams however I weighed my options and decided that it was probably faster to make the block as originally patterned.  You see, everything but the center square is made from strip-pieced units, and strip-piecing is fast – sew a light strip to a dark strip, cross-cut into the required sizes and assemble the units.

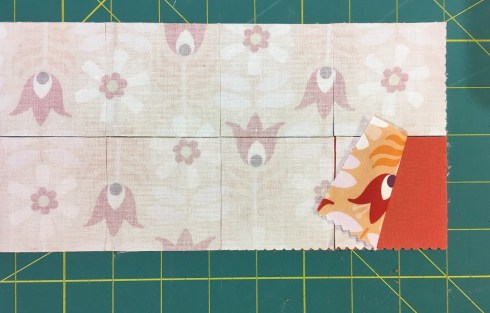
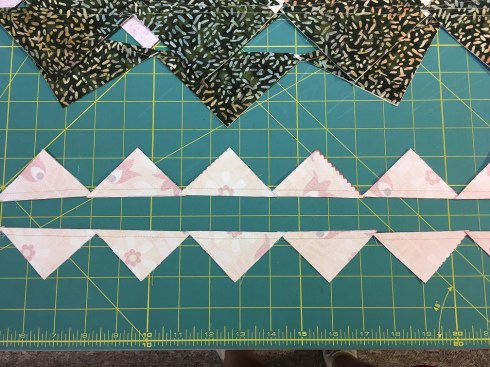
Cross-cut the strip set to make 4-patch units

Cross-cut the strip set to make 4-patch units

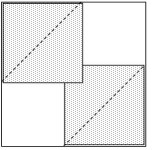
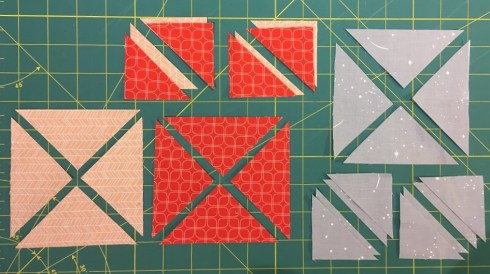
Today’s tip:  The corners of each block are made from units with 2 lights and 2 darks –  we call them 4-patch units.  We cut these from our strip-pieced units and sew 2 pieces together, stacking the light part of one piece on the dark part of the other piece.  To make this faster, let’s stack our strip sets this way to cut these pieces.
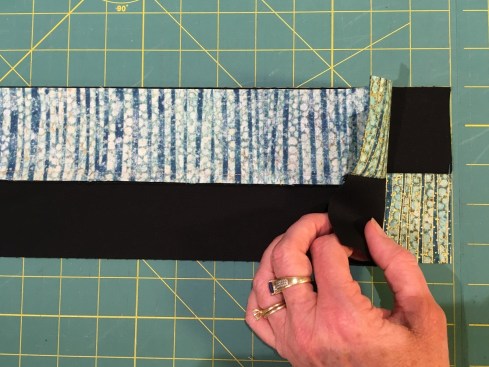
Stack 2 strip sets light-on-dark and dark-on-light to cut the pieces for the 4-patch units

Stack 2 strip sets light-on-dark and dark-on-light to cut the pieces for the 4-patch units

Then when we pick them up off our cutting mat they are perfectly aligned and ready to be sewn together.

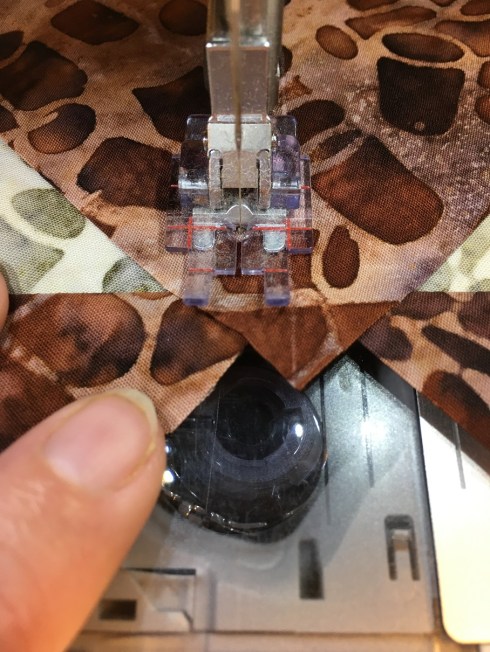
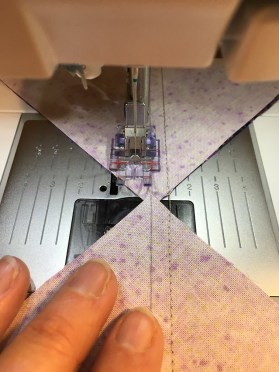
Tip #2:  Our seams will match better in these 4-patch units if we sew them with the seam of the top piece going away from us and the seam on the bottom piece coming toward us.

Sew with the top seam going AWAY from you and the bottom seam TOWARD you

Sew with the top seam going AWAY from you and the bottom seam TOWARD you

Tip #3:  After sewing the 4-patch units, finger-press the seams all in one direction – clock-wise or counter-clock-wise, depending on the direction of the strip-pieced seams – and let the stitches in the seam allowance at the center become loose so you can spin the seams and press them flat.  This distributes the bulk from that center seam.

I pushed the seams in a counter-clockwise direction and let the stitches in the center pop undone to flatten the intersection

I pushed the seams in a counter-clockwise direction and let the stitches in the center pop undone to flatten the intersection

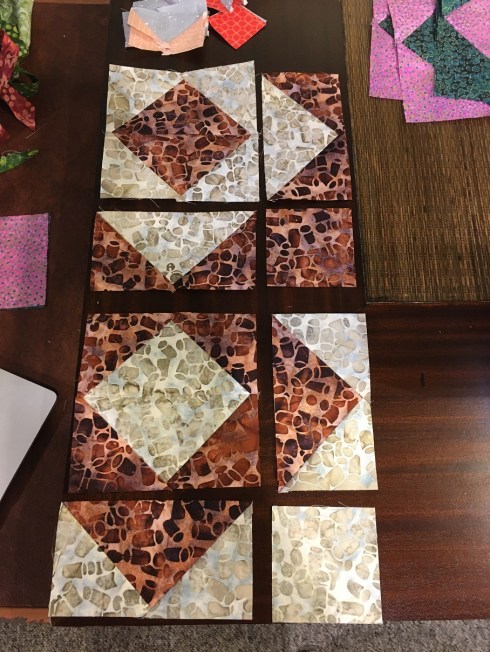
Once the 4-patch units are done, we assemble our blocks and we’re done.
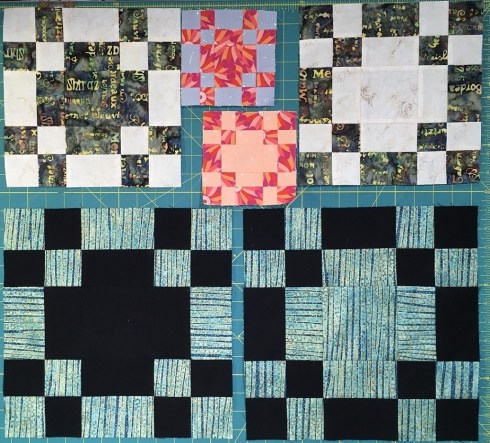
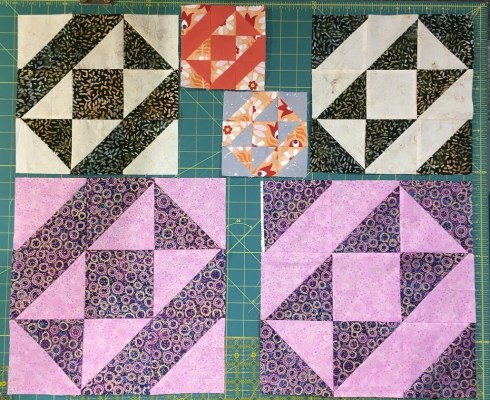
Block 10 done :)

Block 10 done 🙂

You can find my instructions for Block 10 here.

I have a short To Do list for your today:

1)  It’s Friday a.k.a. Prize Day so head on over to the Northcott Facebook page and post pictures of your blocks from this week.  You only have until midnight EST to enter this week’s random draw.  Everyone who posts has a chance to win.

2)  Check out the Facebook pages to see the cool quilts made with today’s block – Northcott has used Shimmer coral and Banyan has used Ocean Park by Scott Hansen of Blue Nickel Studio.  I met Scott and his wife and daughter at Quilt Market a couple years ago – he is so much fun!

3)  See what Daphne has been up to with Block 10 on her blog.

Enjoy your day and I’ll see you tomorrow 😊

Cheers,

Patti
Time to Quilt Block 9 is here

16 Apr The scored line shows up well on busy fabrics

Fellow Quilters,

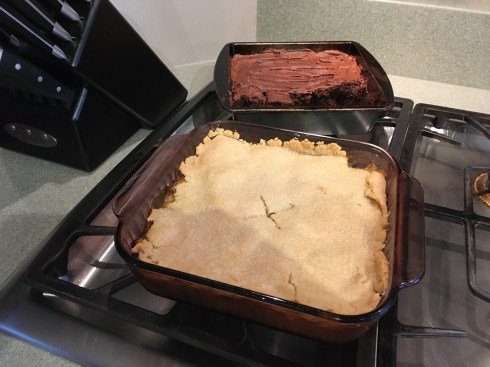
Do you like leftovers?  Hubby and I sometimes like them better than the original meal.  Lasagna, for instance, is so good as leftovers.  Last night I made a turkey pot pie with the leftover turkey from Sunday’s dinner.

Last night's dinner - turkey pot pie and chocolate brownies - yum!

Last night’s dinner – turkey pot pie and chocolate brownies – yum!

I make my own pastry – it’s quite easy.  The next time I make some I’ll show you my tricks and tools to make it almost foolproof.  Here’s an easy hack for the best pastry ever for savoury pies – put 3-4 tbsp of parmesan cheese in the flour before you add the shortening or butter.  It makes the pastry “short” – it crumbles in your mouth – and really tasty.  I made some chocolate brownies too, from a mix (I was too busy sewing blocks!).  It’s almost as good as homemade – at least Hubby says so.  What cooking or baking hacks do you have?  Which mixes are as good as homemade?

Shall we get to today’s block?  Time to Quilt Block 9 is another straightforward block similar to Blocks 1, 6 and 8 in that it has half-square triangle units and squares – that’s it!  And just like yesterday’s block I have no modifications to the original instructions posted on Northcott’s, Banyan’s and FIGO’s Facebook page other than the addition of the make-it-mini and super-size versions.  I do however have a handy marking tip for those half-square triangle squares:

Today’s tip:  My second favorite tool for quiltmaking (my favorite tool is of course my E-Z Miter tool for fast fool-proof mitered borders and lone stars 😊) is the Clover Hera marker for applique.

Clover Hera Marker for applique

Clover Hera Marker for applique

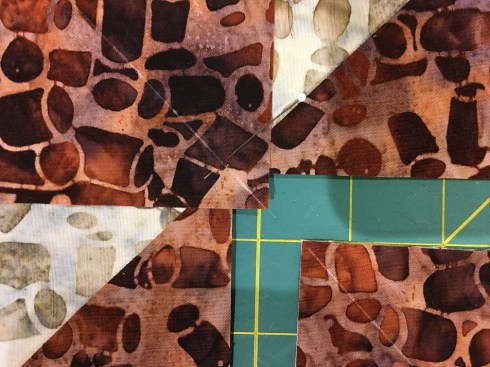
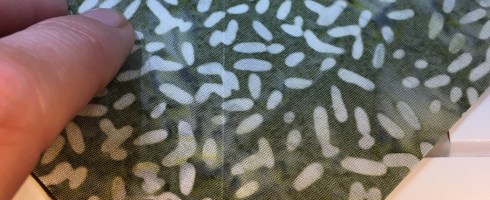
It is smaller than the regular Hera marker I often see when I teach.  I usually use this tool for finger-pressing my seams to one side before I press with an iron.  In fact I tend not to press with an iron until the block is finished – that’s how good a job the Hera marker does at finger-pressing.  You can see a short YouTube video of me using it for this purpose here.  I also use the pointy end as a stiletto when I am feeding the patches under the presser foot as I sew them.  The third use is one the tool was actually intended for, and that is scoring a line on the fabric.  Instead of drawing those diagonal lines on the A squares with a pen, I can use the Hera marker.

I use the Hera marker instead of a pen to score the diagonal line on my A squares.

I use the Hera marker instead of a pen to score the diagonal line on my A squares.

(I should have used the Hera marker instead of a pen when I drew the lines on the wrong squares while making Block 5 ☹.)  It works particularly well on busy fabrics where a line is hard to see.

The scored line shows up well on busy fabrics

The scored line shows up well on busy fabrics

The regular Hera marker works just as well – press just hard enough to see the line, not hard enough to cut the fabric.  Some of the regular ones have a very sharp edge.

I wasn’t paying attention to my Midsommar quilt layout photo and forgot to replace some of my fabric with background gray, so I had some “frogging” to do – RIP-IT, RIP-IT.

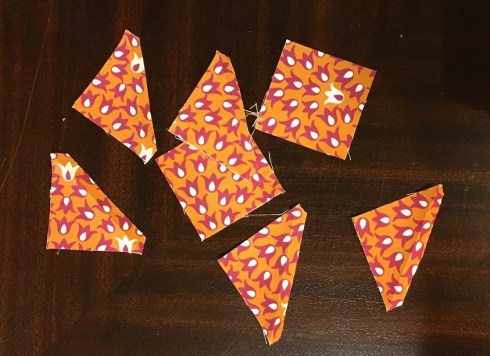
Extra pieces cut and sewn in error

Extra pieces cut and sewn in error

Before I knew it the blocks were done!

Block 9 is done!

Block 9 is done!

You can find my instructions for Block 9 here.

Northcott has used a pretty dogwood floral from The Joys of Spring for their block today, while Banyan has used Jungle Rose.  The 2 quilts look so different even though the layout is the same!  Pop on over to Daphne’s blog to see 2 other layout options for quilts made with Block 9 and to see what’s on her design wall.

Have a great day and I’ll see you tomorrow 😊

Patti


15 Apr My growing stacks of blocks

Fellow Quilters,

My pile of completed blocks from the Time to Quilt quilt-along is growing!

My growing stacks of blocks

My growing stacks of blocks

Doing 3 sets per day is keeping me hopping.  Have you been keeping up with me?  I know some of you have, because I’ve seen photos of your blocks.  Have you tried the easy block assembly tip I gave you in the Block 6 pattern and shown in the photos in my blog post for Block 7?  I’m interested in your feedback – it’s so much easier to show something in a live demo than using step-by-step photos or just words.  By the way, this assembly method is applicable for most of the 24 blocks in the quilt-along, so if you’re only on Block 2 or 3 you can still use it.  Trust me – I did!

So, for Block 8 I actually followed the original pattern to the letter.  Yup, no changes, just the addition of the make-it-mini and super-size versions and the block layout diagram.  Once again I had just a couple of scraps of one of the fabrics for the Midsommar version so I purposely chose this block for this fabric, knowing that I could manage to get all the required pieces from my 2 bits of red fabric.

2 small scraps of red for my Midsommar version

2 small scraps of red for my Midsommar version

One of the Shimmer fabrics is a stripe – how fun!  I love using stripes in my quilts – they add an element of interest – however sometimes we might want to select how we use them.  Sometimes I want to manage the direction of the stripe to control how the finished block looks.  Let me explain.

In this block the stripe fabric is used in the B squares and also in the A half-square triangles.  If we draw the diagonal line in the same direction on all the stripe A pieces our quilt blocks will look like this.

The stripe fabric in the half-square triangle units is not in a consistent direction in the blocks

The stripe fabric in the half-square triangle units is not in a consistent direction in the blocks

I would prefer if my blocks look like this.

The stripe fabric in each unit is in a consistent orientation - I like this better.

The stripe fabric in each unit is in a consistent orientation – I like this better.

How can I manage this?

Today’s tip:  Knowing that half of my half-square triangle blocks would slope up to the left and half would slope up to the right, I drew half my lines sloping up to the left and the other half sloping up to the right.

I selected the orientation of my A pieces when drawing the line to make the half-square triangle units

I selected the orientation of my A pieces when drawing the line to make the half-square triangle units

Bingo!  I got the results I was looking for.

Once those half-square triangle units are done, this block goes together lickety-split.  I pressed the seams toward the B pieces and middle row, and we’re done!

Block 8 done :)

Block 8 done 🙂

You can find my instructions for Block 8 here.

Did you see what Christina did with yesterday’s block on the FIGO Facebook post?  Her min quilt is fabulous!  Today Northcott has used scrumptious Shimmer for their block and Banyan’s block features Intaglio – lovely!  And be sure to check out Daphne’s blog post – she talks about how she designed the fabrics used in her block today.

See you tomorrow 😊

Patti


Triangle Tip Tuesday

14 Apr My door-hanger on my longarm machine in my sewing room

Fellow Quilters,

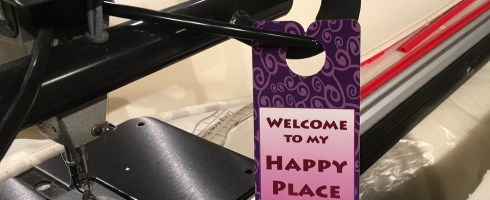
Just when I thought Spring was finally here it snowed last night.  The daffodils that were ready to bloom on Sunday when it was a balmy 13°C (55°F) are now dusted with snow, and the robins are having a harder time finding nest-building supplies now under a layer of white stuff.  It’s interesting to watch them manage in these adverse conditions, just as we are managing these unprecedented times.  Have you found that an hour or two of quilting is your therapy?  I have this door-hanger on the handle of my longarm machine and it makes me smile.

My door-hanger on my longarm machine in my sewing room

My door-hanger on my longarm machine in my sewing room

Quilting is good for us – statistics show that it reduces stress.  So let’s get to our Time to Quilt stress-reduction for today 😊

Time to Quilt Block 7 is another block that I couldn’t leave well enough alone.  Now, you can easily download the original pattern on Northcott’s, Banyan’s and FIGO’s Facebook pages like everyone else is doing.  Nothing wrong with that at all!  However, I have another hack to make this block easier and faster, ‘cause that’s what I do – I can’t help it, it’s how my brain is wired.  Work with me for a minute here while I explain…

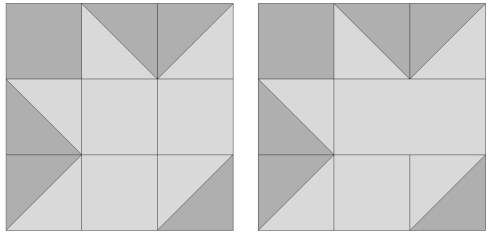
When I looked at this block, I saw large triangles in the two opposite corners – do you see them too?

original Block 7 vs my revised Block 7

original Block 7 vs my revised Block 7

We can eliminate 4 seams in the block by using a large triangle in place of the corner square and two small triangles.  Let’s do it.

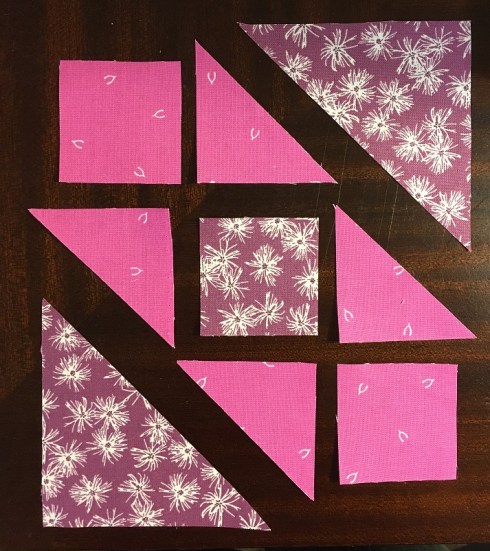
So, yesterday my tip showed you how to assemble the block faster by chain-piecing the units and sections.  We’re going to do the same thing with the center part of this block.  I laid out the components for the block.

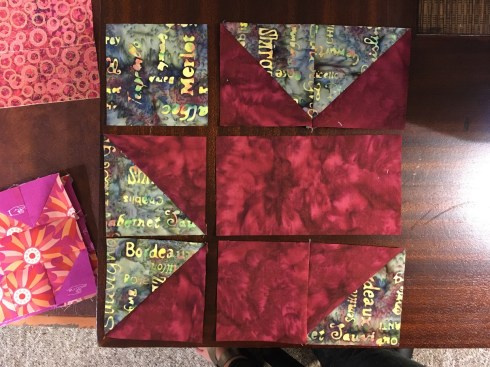
The squares and small triangles form 3 rows of 3

The squares and small triangles form 3 rows of 3

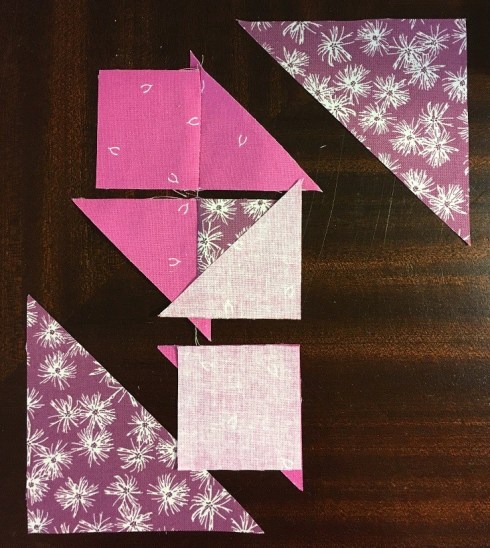
Can you see that the squares and small triangles are arranged in 3 rows and 3 columns? Ignore the 2 large triangles for a moment.  Note that Row 1 is missing a piece in Column 3, and Row 3 is missing a piece in Column 1 – that’s okay.  I flipped the triangle and square in the 2nd column onto the square and triangle in the first column, then chain-pieced them and placed them back into my arrangement.

Flip the pieces in Column 2 onto the pieces in Column 1

Flip the pieces in Column 2 onto the pieces in Column 1

Sew Column 2 to Column 1, finger-press seams toward squares and place back into the layout

Sew Column 2 to Column 1, finger-press seams toward squares and place back into the layout

Then I flipped the triangle and square in the 3rd column onto the square and triangle in the 2nd column and chain-pieced them.

Flip the pieces in Column 3 onto the pieces in Column 2

Flip the pieces in Column 3 onto the pieces in Column 2

The 3 rows are connected by the thread chains and ready to sew together.

The 3 rows are connected by the thread chains and ready to sew together.

I finger-pressed my seams toward the squares as indicated in my instructions.  Then I sewed the 1st row to the 2nd row – they’re still connected by that thread chain – then sewed the 2nd row to the 3rd row and finger-pressed the seams toward Rows 1 & 3.

I sewed the 3 rows together and finger-pressed toward Rows 1 & 3. Leave the triangle tips on!

I sewed the 3 rows together and finger-pressed toward Rows 1 & 3. Leave the triangle tips on!

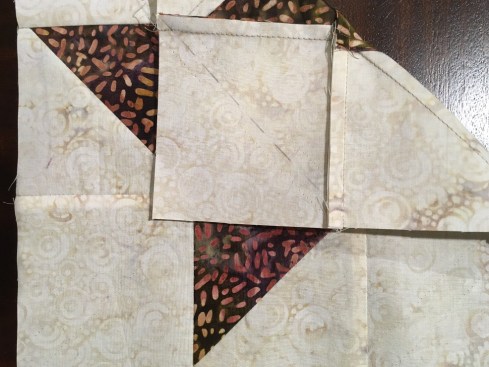
Today’s tip:  I thought about trimming those triangle tips but I stopped – I will used them as a guide when I sew the corner large triangles onto the block.  I laid my center section face down on my large triangle and aligned the triangle tips with the ends of my large triangle, then I sewed the seam.

Lay the center section on the large triangle, aligning the triangle tips

Lay the center section on the large triangle, aligning the triangle tips

Now I trimmed my triangle tips. Perfect!  Done!

Block 7 done :)

Block 7 done 🙂

You can find my instructions for Block 7 here.

Pop on over to my friend Daphne’s blog to see what she’s done with today’s block.  Northcott has used Rod & Reel in their block/quilt and Banyan is showing Cherry Blossoms – pretty!

See you tomorrow 😊

Patti


Make-it-Fit Monday – Day 6 of Time to Quilt

13 Apr A close-up

Fellow Quilters,

Happy Monday!  How many of you had a fancy dinner last night for Easter?  I’ve seen a few posts on Facebook that show a traditional turkey dinner with all the trimmings and only 1 or 2 people are sitting at the table as we continue to practice social distancing.  What did you prepare for dinner, or have delivered by a friend/neighbor? There will be lots of leftovers this week – leftovers are the best!  Turkey pot pie is on the menu for Wednesday at our house, and Hubby is looking forward to turkey sandwiches until then, especially with that Gran Marnier cranberry sauce I made yesterday.

Today is Block 6 of the Northcott/Banyan/FIGO Time to Quilt quilt-along.  Do you have a favorite block so far?  My modern side is leaning toward Block 2 and Block 4.  And I’m getting used to sewing the piddly little pieces in the Midsommar make-it-mini size.  Although I usually don’t work with pieces that small, I must admit that the Midsommar blocks are adorable and I am super-pleased that the seams are matching nicely in the blocks.  So, let’s get to the block.

I made one small tweak to the instructions posted on Northcott, Banyan and FIGO’s Facebook/Instagram pages – I replaced a section of 2 plain squares with a rectangle to eliminate 1 seam.

original Block 6 and my revised version replacing the 2 center squares with a rectangle

original Block 6 and my revised version replacing the 2 center squares with a rectangle

It seems insignificant, but in the make-it-mini version it reduces bulk (there is proportionately a lot more seam allowance in this size).  I also had small scraps of fabric for this version and couldn’t get 5 A squares and 4 C squares from my scraps.

My 2 scrap pieces of Fabric #2 for the Midsommar version

My 2 scrap pieces of Fabric #2 for the Midsommar version

Converting 2 C squares into a B rectangle saved me ½” – it made the difference between being able to use this fabric and not.  I had 1/8” left over at the end of my scrap of fabric after cutting my pieces.  Because we need the same pieces from each of the 2 fabrics used in the blocks I usually stack my 2 fabrics and cut them at the same time – it speeds up the cutting process, reducing the time required by almost half.  I did this for the Vino and super-size Shimmer versions.

Today’s tip:  Once I have the half-square triangle units sewn, it’s time to assemble the block.  I sew the 2 HST units in the top row together and I pressed the seam open to reduce bulk.  In the bottom row I also sewed the C square and right HST unit together.  Then I arranged the components of the block in 3 rows, with 2 units/pieces in each row as shown.

Block 6 ready for assembly

Block 6 ready for assembly

I flipped the right-hand sections face down on the left-hand units, aligning them along the right edge. Then I chain-pieced the 2 units in row 1, then the 2 units in row 2, then the 2 units in row 3 so that they are all connected by a thread chain.

I flipped the right-and column of sections face down onto the left column of units and chain-pieced them

I flipped the right-hand column of sections face down onto the left column of units and chain-pieced them

Here’s the important part – I didn’t cut them apart.  I kept them linked by the thread chain because this keeps the 3 rows in the correct order and correct alignment (not flipped around or upside down).

The 3 rows connected by a thread chain

The 3 rows connected by a thread chain

A close-up

A close-up

Then I sewed the horizontal rows of my block.  Easy peasy and much faster because I chain-pieced and didn’t have to go back to my notes to verify which row is top, middle, bottom and which unit is on the left edge/right edge.  This speeds up the block assembly by at least 50%. I cannot take credit for this concept.  I learned this from the book “400 Quilt Blocks to Sew in 20 Minutes or Less” by Linda Causee.  Thank you Linda!  And just like that, Block 6 is done!

Block 6 done!

Block 6 done!

You can find my instructions for Block 6 here.

Northcott has used the pretty Bouquet collection for today’s block, and Banyan is showing Baralla – lovely!  And I’m sure Daphne has some great layouts for you today too.

See you tomorrow for Block 7 😊

Cheers,

Patti
When things go awry…

12 Apr Midsommar quilt per the instructions and my modified version substituting some background fabric in the blocks

Fellow Quilters,

I should have heeded the warning signs.

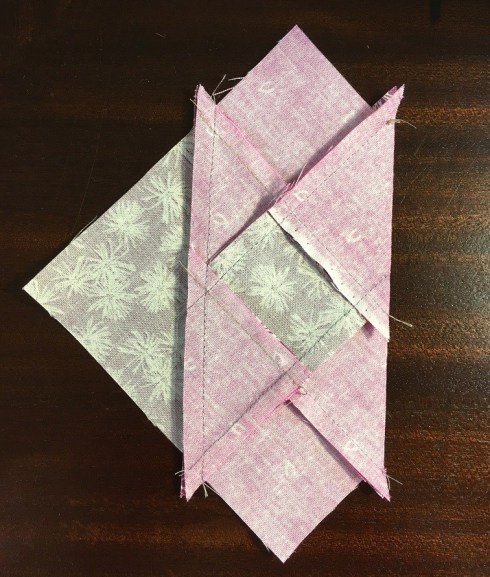
Things were going exceptionally well.  The instructions for Time to Quilt Block 5 were written in record time, completed before dinner – this was a first!  They were fairly straight-forward, following the original instructions from the Northcott, Banyan and FIGO Facebook/Instagram pages with the exception of the center unit – I used the same square-in-a-square method that we used in Block 3.  I quickly washed the dinner dishes then headed to the sewing room.  Block fabrics were selected and pressed – all good.  I cut all the pieces according to the instructions, sorting them into 3 piles for the 3 sets of blocks.  From each set I snapped up the squares used for the half-square triangle blocks, grabbed my pen and marked the diagonal cutting line.  Whipped them through the machine, sewing ¼” each side of the line, then set them aside and prepped the center square-in-a-square units.  Wait!  Since I’m doing a modified Midsommar version and replacing some of the fabrics with the gray border fabric, one of my 2 Midsommar blocks needs some gray pieces.

Midsommar quilt per the instructions and my modified version substituting some background fabric in the blocks

Midsommar quilt per the instructions and my modified version substituting some background fabric in the blocks

Back to the cutting table with the gray fabric to cut the center square and some gray half-square triangle squares.  Wait!  I also need more purple half-square triangle squares unless I want to unpick the ones I sewed in error.  Quickly checking my quilt layout, I determined that I could use the already-sewn pieces for Block 23.  I set them aside and cut some replacements.  Done and back to the machine.  All the components are now sewn, so it’s on to the block assembly.  Something’s wrong!  My center unit for the 9” Vino block is smaller than the B squares.  How can that be?  Because they are the A squares!  I had mistakenly grabbed the B squares and sewed half-square triangle blocks from them!  NO!  Back to the machine to prep and sew the half-square triangle units with the A squares, and unpick the units made with the B squares (luckily I hadn’t cut them apart yet).

I mistakenly drew diagonal lines on my B squares - hopefully they won't show through

I mistakenly drew diagonal lines on my B squares – hopefully they won’t show through

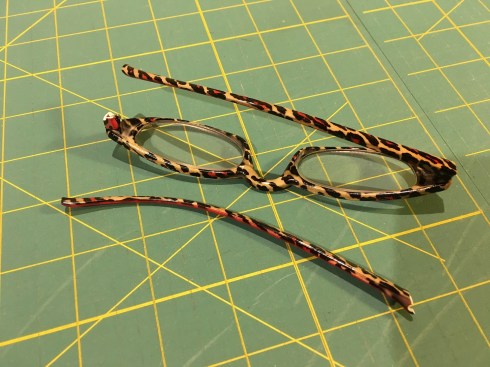
Fingers crossed that the diagonal pen lines won’t show through from the wrong side when the quilt is quilted.  Then my sewing glasses fell off my face – just jumped off! What?!? The arm snapped while I was wearing them.

Broken sewing room glasses :(

Broken sewing room glasses 😦

Irreparable – now in the garbage.  I resorted to my not-as-comfortable and not-nearly-as-stylish regular readers and forged onward.  I laid out the components for the Midsommar blocks.  Wait!  I forgot to cut the gray B squares too!  Waaaaah!  I pulled out the gray fabric yet again, cut the missing pieces and set the extra purple pieces in the growing pile of surplus cut pieces.

Mis-cut pieces set aside for a future block

Mis-cut pieces set aside for a future block

I wondered what else could possibly go wrong.  Fortunately nothing did and the blocks were quickly finished.

Block 5 done finally!

Block 5 done finally!

Moral of the story:  Quit while you’re ahead, heed the warning signs, step away from the sewing room and do something else.

Today’s tip:  I usually indicate the direction to press seams and for this block you may be wondering why I suggest you press the seams TOWARD the half-square triangle units.

Press toward the half-square triangle units and away from the square-in-a-square unit

Press toward the half-square triangle units and away from the square-in-a-square unit

My reasoning is because I want to press the seams AWAY from the square-in-a-square unit in the center. I figure if I press TOWARD the square-in-a-square unit there is a bigger lump of seam allowance to manage when I am quilting.  In the top and bottom rows we press the seams TOWARD the half-square triangle units so that when we sew the 3 rows together the seams will nest nicely.  I know you want to press the seams toward the B squares in the corner but it will make it harder to match the seams.  When I sewed the 3 rows together I sewed with the middle row on top so that I could see the sewing lines on the square-in-a-square block and I aimed my stitching line right through that intersection, actually 1 thread width to the right of it.  The result is perfect points.

Sew through the intersection

Sew through the intersection

The blocks on the Northcott and Banyan Facebook pages have been made with Forest Frolic (I love this collection!) and Kayana – check them out😊 And visit Daphne’s blog to see what she does today with her Block 5.

You can find my instructions for Block 5 here.

Time for some domestic chores – I’m heading to the kitchen to make turkey stuffing and cranberry sauce (with Gran Marnier – yum!).  Have a peaceful and pieceful day, and we’ll see you back here tomorrow for Block 6.

Cheers,

Patti

A Great Hack for Block 4

11 Apr Block 4 done!

Fellow Quilters,Time to Quilt logo

Happy Saturday and welcome to Day 4 of the Time to Quilt quilt-along.  Did you post photos of some of your blocks on Northcott’s Facebook page yesterday for a chance to win some swag?  At least one of my followers is a winner – a shout-out to Dixie!  I popped onto Northcott’s page today to see the winners and also see some of the blocks that quilters have posted.  There are some lovely fabric combinations being used. The next chance for some swag is next Friday, so you’ll have another 7 sets of blocks to choose from to share on Northcott’s Facebook page or on Instagram with the #timetoquiltfigo.

Have I got a cool hack for your today!  As I mentioned on Day 1 all the blocks in the Time to Quilt quilt-along are based on a 9-patch grid and Block 4 is no exception. Here is the black & white line-drawing of the block.

Block 4 as a 9-patch with and without patch lines

Block 4 as a 9-patch with and without patch lines

When I looked at the block, I saw diagonal strips however.  Can you see them?  If I remove the patch lines it is more obvious.  I was trying to figure out how to cut the diagonal strips with the funny angled end.  I had it pretty much figured out and I was working on my diagrams for my instructions when I had a light bulb moment.  You’re gonna love this!!  For the 9-patch version, we cut 4 larger squares and 6 smaller squares of each fabric for the hourglass and half-square triangle units (total of 20 pieces).

Make 2 dark-light-dark rail fence blocks and 2 light-dark-light rail fence blocks

Make 2 dark-light-dark rail fence blocks and 2 light-dark-light rail fence blocks

Instead, I cut 6 rectangles of each fabric (total 12 pieces) and made 4 rail fence blocks – 2 with light-dark-light and 2 with dark-light-dark.  Then I cut them into half-square triangles as shown and assembled the block as an hourglass block.

An hourglass block made with 4 half-square triangle units from my rail fence blocks

An hourglass block made with 4 half-square triangle units from my rail fence blocks

It was lightning-fast!

There are 2 caveats with this block:  #1 – the edges of the block are bias.  I will keep this in mind when I assemble the quilt and use the BOB (bias on bottom) or Baggy Bottom rule.  Thanks to Bonnie L for sharing the BOB tip on my March 30 blog post.

Today’s 1st tip:  I press my block going with the grain of the fabric.  In this case I am pressing it from corner to corner, not from bottom edge to top edge or side to side because that is the direction of the bias.  I am much less likely to distort my block if I press in the direction of the grain.  This holds true when I press half-square triangle blocks as well – I don’t press along that diagonal seam.  Rather, I press from bottom to top.

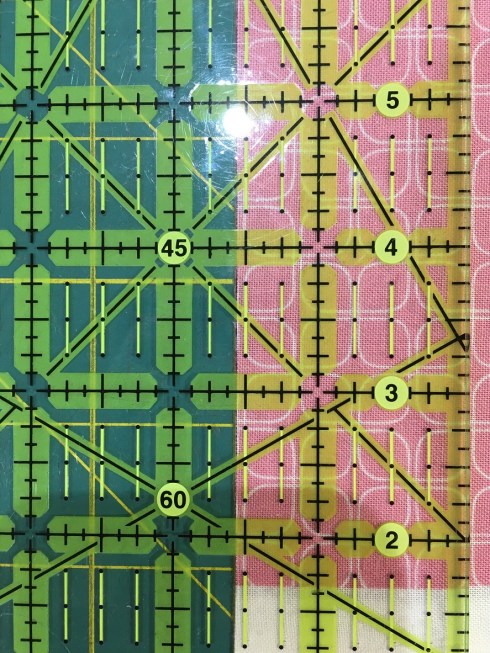
Caveat #2 – the size of the pieces for the mini and super-size versions is not a nice round number but it’s a fairly easy work-around.  I instruct you to cut width-of-fabric strips that are a scant 1⅝” for the mini or scant 3⅜” for the super-size.  What does this mean?  In this case (and I have included a note in the pattern below the cutting chart) scant is half-way between the 1⅝” line (for the mini version) and the next smaller marking on most rulers, which would be 1½”.  For the super-size it is half-way between 3⅜” and 3¼”.  If your ruler has 1/16” markings you’re good to go.  Otherwise here is what that looks like.

Cut scan 1 5/8" strips by cut half-way between 1 1/2" and 1 5/8"

Cut scant 1 5/8″ strips by cutting half-way between 1 1/2″ and 1 5/8″

Today’s 2nd tip: I find it easier to line up the lines of my ruler with the lines on my cutting mat, not the edge of my strip.  It is easier to see if the 1⅝” and 1½” hash marks are equidistant from the vertical line on my mat where my fabric is aligned.

I find I get more accurate cuts when I align the ruler with the mat, not the edge of the strip.

I find I get more accurate cuts when I align the ruler with the mat, not the edge of the strip.

Here are my finished blocks, hot off the press.

Block 4 done!

Block 4 done!

Alright then, let’s get those blocks done.  Whichever method you choose, enjoy your sewing time.  If you try my method I welcome your feedback.  Feel free to leave a comment below.

My instructions for Block 4 can be found here.

On the Banyan Facebook page today the blocks are made with my friend Daphne’s Tapa Cloth fabric collection.  Daphne has done up some quilt design options using the block with and without sashing, and also as a border around one of her fabulous Tapa Cloth panels – check out her blog post.

See you tomorrow!

Cheers,

Patti


Time to Quilt Block 3 (and Block 2 too)

10 Apr

Fellow Quilters,

Yesterday was not the best day.  I am scrambling to get my Time to Quilt daily blocks done, write the pattern that includes the 3 size options and then get a blog post written to share the pattern with you.  My goal is to get everything done at least a day in advance so the pattern is in your Inbox when you start your day, not at dinnertime.  I’m hoping to be there by Sunday.  Hubby says I’m like a mini tornado tearing around the house.  Half-way through dinner last night I realized I had an epic fail on yesterday’s blog post.  Did you have a hard time finding my instructions in my blog post yesterday?  Of course you did, because I forgot to provide the link.  So sorry!  This is not supposed to be a “hide-and-seek” kind of thing – the download link is supposed to be quite obvious.  Hubby says I need a checklist.  Recently I watched a short TED talk video about the importance of checklists and how it reduced deaths during surgery by a whopping 47%.  I now have a checklist.  Guess what’s on the top of the list?  Yup, include the pattern link.  I updated yesterday’s post to include the link in not one but 2 places, and I am including it here as well.  I’m also going to make it easy for you to find the daily download by placing it at the end of each post in a very obvious spot in addition to earlier references in the post.  Now on to today’s block.

Block 3

Block 3

Block 3  is a pretty 9-patch block with lots of sew-and-flip triangle corners.

Sew-and-flip corners

Sew-and-flip corners

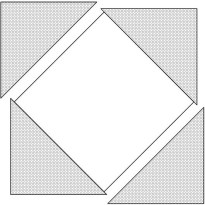
We place a square in the corner, sew diagonally through the square and trim away the excess fabric in the corner.

Easy peasy!  The downside is that it wastes some fabric, unless we keep those trimmed-off corners for another project.

wasted trimmings

wasted trimmings

It’s a trade-off between accuracy/ease of construction and cost of fabric.  When I was working on the calculations for the cutting of my 3 options, I used Northcott/Banyan/FIGO’s pattern for Block 3 as a starting point.  The yardage requirements given are “fat ⅛yd or 6 inches”.  As a rule, I use a size of 20” x 9” for a fat ⅛, and a size of 40” x 4½” for ⅛yd.  I couldn’t cut the required pieces from either of these sizes.  I needed a 6” x width-of-fabric strip.  But I want to use a fat ⅛, so how can I squeeze the pieces out of it?

A square-in-a-square block replaces sew-and-flip corners in the center of Block 3

A square-in-a-square block replaces sew-and-flip corners in the center of Block 3

I re-gigged the center square to construct it from one smaller on-point square and 4 half-square triangles – a square-in-a-square – so my instructions are once again different than the Northcott, Banyan and FIGO ones on Facebook or Instagram.  I also needed my fat ⅛ to measure 21” wide instead of 20”.  Because I am using my Vino batiks, this wasn’t a problem.  When I am using regular printed cottons, I occasionally use part of the white selvage for my seam allowance (I did this on my super-size Shimmer Block 1).

I used part of the selvage for my seam allowance in my Shimmer Block 1

I used part of the selvage for my seam allowance in my Shimmer Block 1

I just don’t use ALL the selvage.  The edge is where the tightness is, and I want to avoid that.

Today’s tip:  When sewing the center square-in-a-square block, we align the corner triangles so that they extend ⅜” beyond the top and bottom edges of the square.

The upper and lower tips of the triangle extend 3/8" beyond edges of square

The upper and lower tips of the triangle extend 3/8″ beyond edges of square

Our ¼” sewing line starts and ends on the triangle, not at the edge of the block.

Sew with a 1/4" seam

Sew with a 1/4″ seam

After adding triangles to opposite edges of the square, I finger-press my seams toward the triangles.

When adding the adjacent triangle it crosses the upper and lower triangles 1/4" from the right edge for perfect placement.

When adding the adjacent triangle it crosses the upper and lower triangles 1/4″ from the right edge for perfect placement.

When I add the triangles to the remaining opposite edges, they are correctly aligned when they cross the previous triangles ¼” from the edge.  We saw this with yesterday’s block – when 2 seams cross at opposite angles our ¼” seam goes right through the “V”.  If we lay both triangle pieces on the square, the overlapped part in the center will be a square.

The overlapped part is square

The overlapped part is square

If it’s a rectangle, one of the triangles isn’t correctly positioned.

The overlapped part is a rectangle - not good! The triangle on the right is too high.

The overlapped part is a rectangle – not good! The triangle on the right is too high.

Here are my finished blocks.  The Midsommar block units were SMALL!  I slowed my sewing speed right down and took my time with them, and they came out perfect – yay😊

Block 3 is done!

Block 3 is done!

As promised, here is the link to my multi-sized Time to Quilt Block 3.

I’ve got a short checklist for you today:

1)  You’ll want to check out my friend Daphne’s blog post today too.  She shares some great tips and some pretty layouts for quilts made with today’s block.

2)  Share your best blocks for this week on Northcott or Banyan’s Facebook page or on Instagram, tagging FIGO, for a chance to win free fabric!  Don’t forget to add #timetoquiltnorthcott, #timetoquiltbanyan or #timetoquiltfigo

We’ll see you back here tomorrow for Block 4.  Have a great day!

Cheers,

Patti

Day 2 of Time to Quilt

9 Apr Block 2 done

Fellow Quilters,

How are you today?  Where I am it snowed last night.  Just a bit, and it melted quickly so it’s gone now, but this tells me it’s too early to think about planting flowers.  I’m glad it was cold enough to snow because Hubby put the balance of our homemade moose lasagna dinner outside to cool down before putting it in the fridge, and we (he) left it out all night.  Thankfully the squirrels didn’t find it. Or the deer. Or the coyotes – I think we would have heard the coyotes if they had found it.

Time to Quilt logoMy blog posts for the next 23 days will center around the Time to Quilt quilt-along.  I’m pretty pumped – in 3 weeks time I’m going to have the blocks for 3 quilts done and ready to be assembled!  There’s the wall-hanging/crib-size Midsommar make-it-mini version that is 32” x 41”, the throw-size Vino ice wine version that is 69” x 89”, and the super-sized Shimmer queen version that is a whopping 94” x 118”.  Crazy me for doing a quilt for each of Northcott’s divisions AND for making each one a different size block – the standard 9” that the other participants at Northcott are using, the super-sized 12” and the make-it-mini 4½”.  What size are you doing?  Are you challenging yourself by doing more than 1 size as well?  Please leave a comment letting me know – I would love your feedback.  Please also share photos of your fabric choices and your blocks – you can email them to me at patti.pattispatchwork@gmail or post them on my Patti’s Patchwork Facebook page.

The link to my instructions that include the 3 size options for Block 1 was in yesterday’s post.  If you’re doing the standard 9” option you can also find the instructions on Northcott, Banyan and FIGO’s Facebook and Instagram pages, along with ideas on how to use just the daily block to make a quilt.  Some of the quilts are pretty awesome!  My good friend and colleague Daphne is also posting daily on her blog using her Tapa Cloth collection.  Lots of ideas and inspiration for you.

So let’s get to today’s block.   You will find my instructions here.  When I design or make a quilt I’m all about simplifying, eliminating unnecessary steps or seams, and making the process more efficient.

Can you see flying geese units?

Can you see flying geese units?

When I looked at today’s block I saw flying geese units.  Can you see them too?  While I could make the flying geese unit using 2 half-square triangle blocks, my efficient brain wants to eliminate the center seam connecting the 2 half-square triangle blocks.  Looking at today’s block I see 2 light-colored flying geese and 2 dark-coloured flying geese.

The no-waste method of making flying geese units.

The no-waste method of making flying geese units.

My favorite way of doing flying geese is the no-waste method where I use 1 large square for the geese fabric and 4 smaller squares for the sky fabric, resulting in 4 identical flying geese blocks.  Now, there are only 2 of each geese in today’s block so this might not work.  But wait!

Between the positive and negative blocks there are 4 light and 4 dark geese

Between the positive and negative blocks there are 4 light and 4 dark geese

In the alternate block there are also 2 light-coloured and 2 dark-coloured flying geese blocks – perfect!  We can do this 😊.

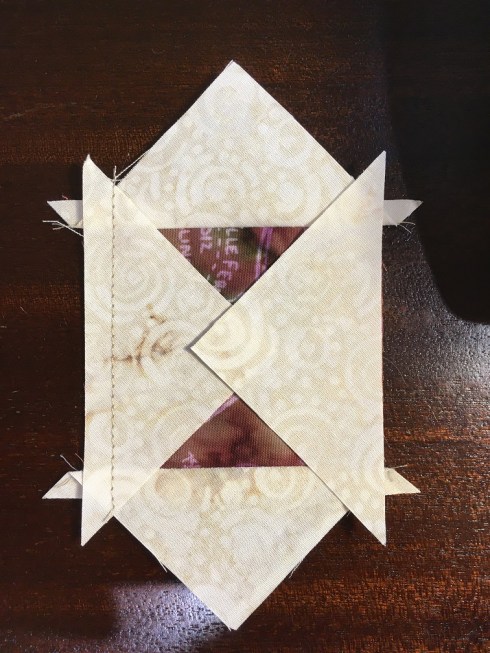
Today’s tips:  1) When laying the smaller sky squares on the larger geese square, lay the upper sky square on top of the lower square to prevent the presser foot from getting caught on the leading edge of the lower square.

Position the upper square on top of the lower square

Position the upper square on top of the lower square

2)  My favorite marking tool for drawing on darker fabrics is the Clover white marking pen – it makes a very thin line and disappears with a drop or 2 of water or with a quick swipe of the iron.  The line takes 10 seconds to appear so if you mark the line several times in the first 2 seconds thinking it’s not working, you’ll have a REALLY obvious line in 10 seconds.  Voice of experience here.

The Clover white marking pen is my favorite way to mark dark fabrics.

The Clover white marking pen is my favorite way to mark dark fabrics.

3)  In step 2 of my instructions, when you lay the sky square on the unit from step 1 the square will be centered between the 2 sky triangles.

The sky square is centered between the 2 sky triangles

The sky square is centered between the 2 sky triangles

I pinned my piece to ensure it stayed correctly aligned as I sewed the seams.  Your sewing lines will go right through the “V” where the sky patches intersect.  This will give you a perfect ¼” seam allowance between the tip of your geese and the edge of the unfinished unit.

Your sewing lines will go right through the “V” where the sky patches intersect

Your sewing lines will go right through the “V” where the sky patches intersect

With my Midsommar blocks I knew I wanted to use some of my gray background in these blocks since they are on the outer edges of my quilt center.  Unfortunately the no-waste geese method didn’t work because I did not have 4 of each geese unit in my block.

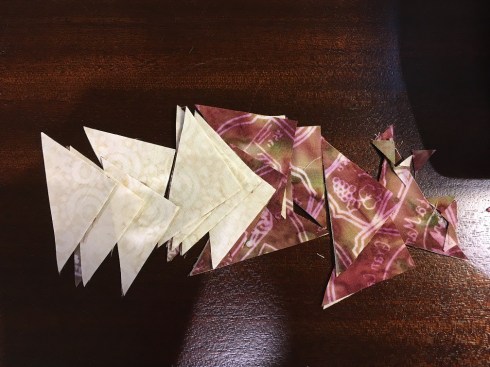
I had to cut my large and small squares diagonally

I had to cut my large and small squares diagonally

I cut my large and small squares diagonally and assembled them the old-fashioned way – it was slower and more tedious.

I made these flying geese units the old-fashioned way - slow!

I made these flying geese units the old-fashioned way – slow!

I much prefer the no-waste method.

Once the geese units were done, I sewed 2 matching units together for the square-in-a-square part of the block, pressing the seam open to reduce bulk, then quickly assembled the block.

Sew 2 matching geese units into a square then sew the block together

Sew 2 matching geese units into a square then sew the block together

Ta da!  Another set of blocks done!  In case you missed it earlier, the pattern for Block 2 is here.

Block 2 done

Block 2 done

Are your quilting peeps joining you in the Time to Quilt quilt-along?  You could challenge each other!  I invite you to share my blog post with them – the more the merrier 😊

We’ll see you tomorrow for Block 3.

Cheers,

Patti
 

Image

Time to Quilt-along!

8 Apr

Fellow Quilters,Time to Quilt logo

Guess what time it is?  It’s the Time to Quilt quilt-along organized by my favorite fabric company!  Northcott, Banyan Batiks and FIGO Fabrics have put together a fun, no-threads-attached quilt-along to help carry us through the next 24 days of self-isolation.  The event starts today and runs through to May 1, with weekly prizes every Friday just for posting your best blocks on the Northcott or Banyan Facebook page, or the FIGO Instagram page.  Find the link to the daily pattern on the Facebook/Instagram pages each day. I’ll be using Northcott, Banyan and FIGO fabrics for my blocks and you can use whatever fabrics you want – they don’t even need to be from Northcott/Banyan/FIGO.  Now, if you happen to like the fabrics in my blocks I’d be happy to point you in the direction of a quilt shop that purchased them (most shops are offering mail order or drive-by shopping so we can all stay safe and healthy).  I’ll also be sharing links to the social media sites of some of my colleagues who are participating as well, so you can see what their blocks look like.  We’re all using different fabrics and these quilts are going to look mah-velous!!  Christina at FIGO is using Lucky Charms and ColorWorks, fellow Banyan designer Daphne Greig of Patchworks Studio is using her Tapa Cloth collection, Banyan creative director Karen is using various pinks and blacks from Banyan Essentials, Susanne is using Banyan teal Essentials for 1 quilt and Northcott tan & black Basics for another quilt, and Hania is doing Canvas multi-colors.

Vino fabric palette

Vino fabric palette

So, let me explain a bit about MY version of the Time to Quilt quilt-along.  I deliberated over which fabrics to use – should I use Northcott, Banyan or FIGO? I am a Banyan designer so I should of course use my Vino fabrics, however the prototype quilt (Susanne’s teal Essentials version) is made with Banyan fabrics.

Banyan Essentials version

Banyan Essentials version

My fellow modern quilt guild members expect me to use FIGO (of course!) and I didn’t want to disappoint, however Christina is using Lucky Charms.  Perhaps, then, I should use Northcott, though Susanne and Hania are working on Northcott Basics versions.  While scouring the shelves of the Northcott sample room my eyes fell upon a stack of luscious, gorgeous, delicious Shimmer samples.

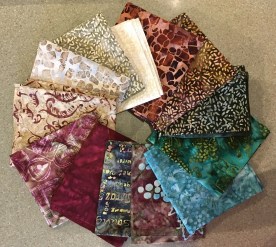
Shimmer fabric palette

Shimmer fabric palette

Without any self-control I reached out and coveted them.  Okay, I admit it – I fondled them, actually.  It became apparent that I would do 3 versions of the Time to Quilt quilt-along.

FIGO Midsommar fabric palette

FIGO Midsommar fabric palette

I quickly snapped up some scraps of FIGO’s Midsommar with coordinating Lucky Charms and got to work on my plans.

Vino block 1

Vino block 1

The size of the block in the daily pattern link is 9” finished (9½” edge-to-edge).  The quilt-along has 24 different blocks and each block is made twice – there is a positive and negative for each, so you cut the exact same pieces from each of 2 fabrics to get 2 positive/negative blocks.

After 24 days, we’ll have (48) 9” blocks, enough to do a 54” x 72” quilt, or 69” x 89” with 1” sashing and 5” borders.  To do this 9” version you’ll need (48) ⅛yd pieces or (24) fat ¼’s plus fabric for sashing and border.  I think this size would look great with the Vino ice wine collection and I selected 12 different fabrics, ¼ – ½yd of each plus some extra cream border/sashing fabric to use in the blocks as well.

Now, not content to leave well enough alone, I thought “Wouldn’t it be more interesting to do a different size block for each of the 3 versions I’m doing?”  If you’ve made any of my patterns, you know I usually include 2-3 size options in each pattern (I like to add value to the pattern).  I got out my calculator, opened up my Electric Quilt file for the quilt-along, and played.  Each block is a variation of a 9-patch so in the 9” block each “patch” is 3”.  What if I increased the “patch” to 4”?  By super-sizing the block to 12” and increasing the sashing to 1¼” with a 7¾” border I can make a 93¾” x 118½” quilt.  Nice, with nice big blocks!  The Shimmer samples would work perfectly for this size, combined with solid black ColorWorks.  It will be stunning.  For this size option I am using 2 fat¼’s or ½yd of 24 shades from the Shimmer collection, perhaps adding some black in the blocks since the shipping samples are only 14” x width-of-fabric.

What other size options would work?  If I reduced my “patch” to 1½” my block would be 4½” for a 27” x 36” quilt, or 32½” x 41½” with a 2¾” border and no sashing.  This would make a darling wall quilt or baby quilt.  Would this work for the fresh happy Midsommar collection?

Midsommar make-it-mini quilt

Midsommar make-it-mini quilt

The small pieces would definitely challenge my pedal-to-the-metal sewing style, however I’m willing to give it a go.  For this size option I have roughly a fat⅛ of 24 fabrics, though some of my fabrics are truly scraps so I will substitute my gray Lucky Charms border fabric in some of the blocks and place those blocks around the perimeter of the quilt before adding the border.  I love this quilt!

I have revised the Northcott/Banyan/FIGO instructions to include the super-size 12” block and the make-it-mini 4½” block and you can find them here.  Today’s block is easy – 8 half-square triangle units and one square. 

Sew 1/4" each side of the line

Sew 1/4″ each side of the line

We sew these the easy way, by placing 2 squares right sides together drawing a line from corner to corner and stitching ¼” away from each side of the line, then cutting along the line to make 2 half-square-triangle units.  I find it is faster and easier to feed these squares under the sewing foot than when I cut the squares into triangles first, then pair up the triangles, especially when I chain-piece them.

Today’s tip:  After cutting my 2 fabrics into strips, I paired up a #1 and #2 strip and placed the strips right sides together to cross-cut them into squares.  This saves a step!

Stack strips right sides together then cut squares

Stack strips right sides together then cut squares

Chained pairs

Chained pairs

Cut along line

Cut along line

Your blocks will be done before you know it 😊.  And just like that I have 2 each of my first block done.

Block 1 done!

Block 1 done!

I’ll see you back here tomorrow for Block #2.

Cheers,

Patti