
Fellow Quilters,
I had the pleasure and honor of having a quilt featured in the latest issue (November/December) of McCall’s Quilting magazine.
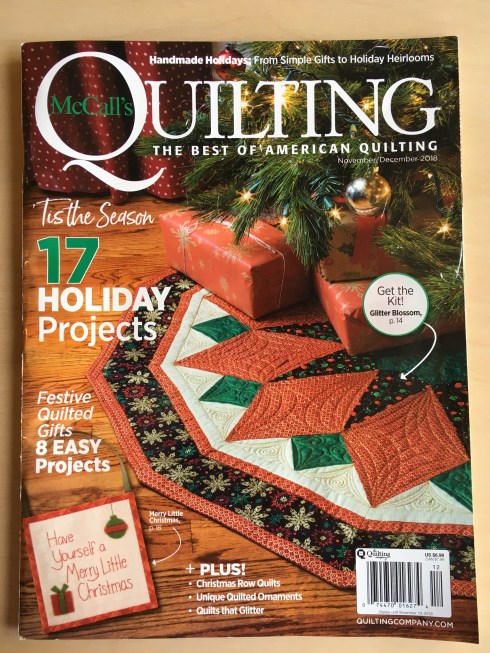
McCalls Quilting November-December 2018 cover
This issue is chock-full of seasonal projects large and small, including one by my quilting bud Dodi Poulson – yay Dodi! There are several bright and jewel-toned projects tossed in as well. My Gemstone Dreams is one of them.

Gemstone Dreams
The quilt is based on a block I designed for Quiltmaker’s 100 Blocks Volume 15. For this quilt, I selected 15 different pairs of textures from Northcott’s Artisan Spirit Shimmer collection, with each pair having 2 shades of the same color – light and dark pink, light and dark teal, light and dark yellow, etc. I also used 2 shades of gray from Shimmer, and a cream Shimmer for the background. In 100 Blocks, I used the same color for all triangles, but I substituted the gray in the corner placement for this quilt. I made 2 blocks with each color duo, managing to squeeze the pieces from a fat 1/8. I opted not to put borders on the quilt, keeping it modern. I stitched some straight lines in each block to emphasize the bevelled effect, then I stitched straight lines ¼” apart in the background, alternating the direction of the lines in each section. I am thrilled with the final quilt. The Shimmer fabrics, with their hint of metallic, are perfect for this project.
To me, the easiest way to construct each block was to do “sew and flip” corners when sewing the smaller colored triangle – I used a square, sewing along the diagonal, pressing along the stitching line and trimming the excess. I did the same when adding the larger gray triangle to the opposite corner.
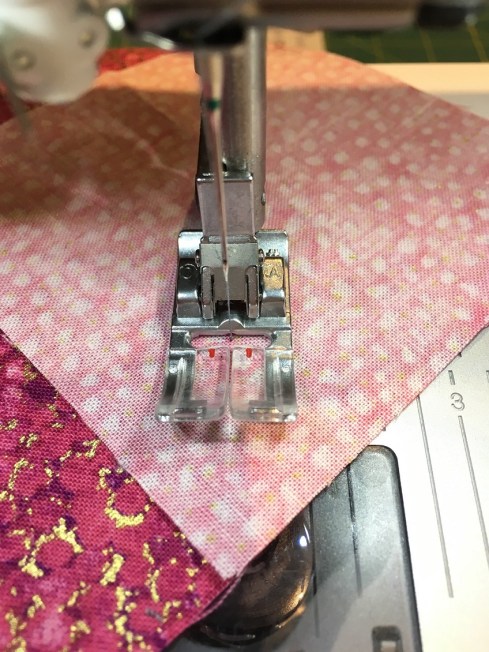
sewing with all-purpose foot
When sewing these, I find it easier to use the all-purpose foot on my sewing machine, allowing the leading tip of the square to slide under the wide toe of the foot instead of getting caught and bunching up or folding back. So, here’s the funny thing. Despite having a warehouse of Northcott fabric at my disposal, it bothered me to discard the excess triangles that I trimmed away.
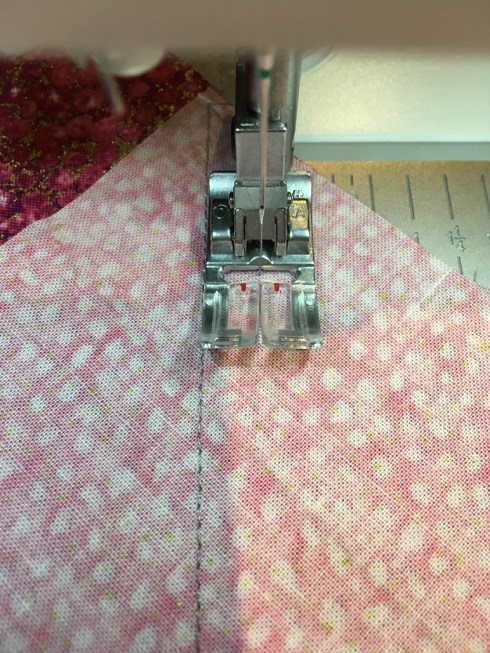
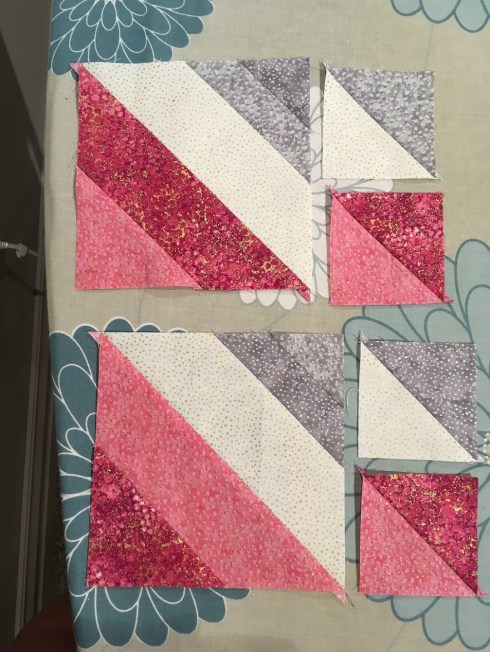
sewing the foot width away from previous line
So, before trimming, I sewed another line the width of my foot, roughly 3/8”, away from my previous line of stitching, then cut between the 2 stitching lines. This gave me 8 half-square triangle blocks of each duo that are almost 3” square.

stitching a foot width away from original stitching line on both squares
I did the same thing with the larger gray corner squares – I sewed a 2nd line and trimmed it away before I added the smaller gray square in the corner.
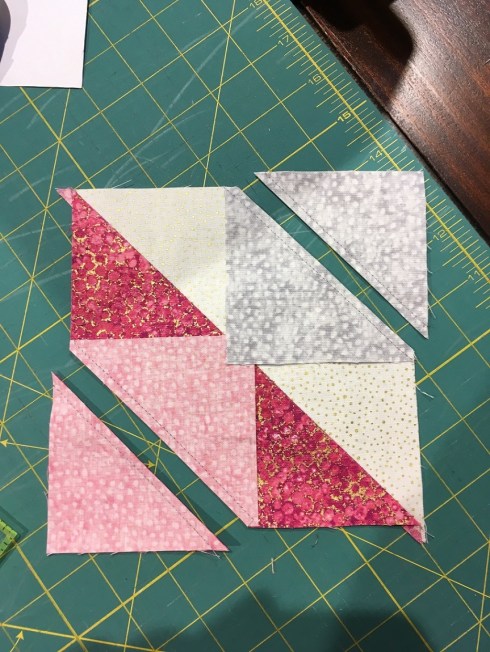
after trimming
I did not save the smaller light-and-dark gray half-square triangle blocks – they were too small for my liking. However, I collected a stack of 60 lighter gray/cream blocks and 60 darker gray/cream blocks to add to the 15 stacks of colored blocks.
what I had after sewing half of a block

new block
I now had a total of 120 colored blocks and 120 gray/cream blocks. I plugged them into my EQ8 design program and created the following block by adding (4) 1½” x 3” cream pieces, (4) 6½” x 3” cream pieces and (1) 1½” square of contrast (I used a darker shade of gray). My block finishes at 11” square not including seam allowances. I made 30 blocks – 2 of each color duo.
I arranged the blocks in a 5×6 layout as for the original quilt. For ease of assembly I added 1” sashing between the blocks (cut 1½” x 11½”) and used the same darker gray 1½” squares as in the blocks for the cornerstones. My quilt finishes at 59½” x 71½” with 2” binding made with the darker gray as well.

my (almost) free quilt made from the trimmed scraps
In total, I needed an extra 3¼yds of cream background cut as follows:
- 20 strips 3” x width of fabric (wof); cut each strip into (6) 6½” pieces
- 24 strips 1½” x wof; cut into (71) 11½” pieces and (120) 3” pieces
I also needed 5/8yd of darker gray cut as follows:
- 7 strips 2” x wof for binding
- 2 strips 1½” x wof; cut into (50) 1½” squares
The end result? With less than 4yds of additional fabric, I got a colorful throw-size quilt. How fun is that?
But wait! It gets better!! From the pieces of colored fabric that I used for my quilt, I managed to cut enough pieces to make another Gemstone Dreams, and I am prepared to give them to one lucky reader. All you need to add is the background fabric and the two grey fabrics. For a chance to win precut squares of all the colored fabrics in Gemstone Dreams, please leave a comment on my blog by November 16 telling me what your favorite Christmas tradition is AND the page number of the November issue of McCall’s Quilting that my Gemstone Dreams pattern is on. You will need a copy of the magazine to make the quilt. Since I also have an extra copy of the magazine, I will draw a second name to win a copy of this terrific issue. I look forward to reading your comments, and good luck to all!
Cheers,
Patti