
Fellow Quilters,
Does life have you going in circles some days?
Today I’m circling back to an email I received last summer from the editors at Quiltmaker magazine requesting designs for the March/April + May/June supersized issue. In it, they put out a call for quilt designs that use large-scale fabrics. Not one to shy away from such a tempting challenge, I perused the upcoming collections of Northcott, Banyan Batiks and FIGO Fabrics in search of a collection containing a variety of large-scale prints. I zeroed in on two FIGO collections, including a bright colorful FIGO collection called Margo by Sydney-based botanical illustrator Adrianna Picker.
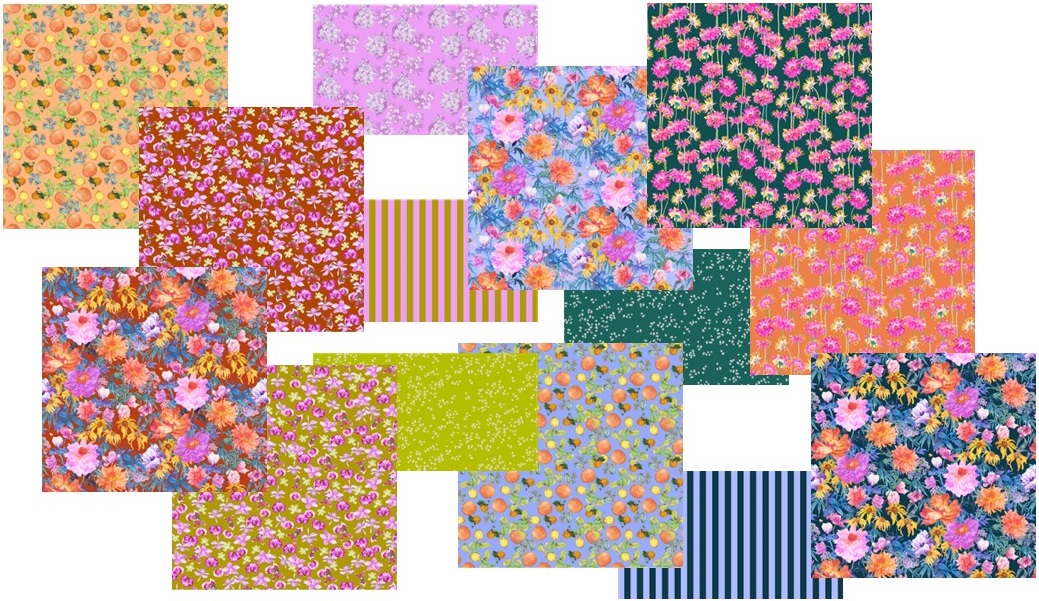
The Margo collection by Adrianna Picker
The detail in this lifelike collection of fruits and florals is exquisite and the color palette is fresh and inviting. The addition of a bold 2-color stripe sealed the deal (I cannot resist a good stripe😊). When I discovered that the collection came in tile packs of (42) 10” squares, I jumped in with both feet (I work best with a narrow set of parameters).
Once the fabric collection was chosen, I started playing with design ideas. I don’t normally combine lots of large-scale prints in my quilts – I like to offset their busy-ness with some smaller-scale or tonal solid-ish fabrics. Working with the pack of 10” squares necessitated the inclusion of all 14 designs however, so no opportunity to save some prints for another project. The color palette is also delightfully busy – everything but red is used. How could I separate the prints and bring some order to the chaos of busy-ness while making best use of the 10” squares?
Around (a-“round” – haha) the same time, I was also working on the block-of-the-month design for my local guild (I am the BOM coordinator). This year’s theme is blocks with curves. One of the blocks is a circle in a circle. Hmmm… could I apply this concept to my pack of 10” squares? How could I use every bit of each square, while still using circles?
After playing with the fabrics in my Electric Quilt EQ8 design program for a bit, I arrived at my chosen design.

My EQ8 digital image of my proposed design
Half the blocks have neutral a.k.a. solid-ish rings to separate the prints, while others combine busy and not-so-busy prints. The light-colored neutral sashing further gives another layer of order, while the cornerstones add a pop of fun. One of the bold stripe fabrics adds an extra sizzle as binding. Happily, my design, entitled Cirque de Fleurel, was accepted. I started cutting and sewing.
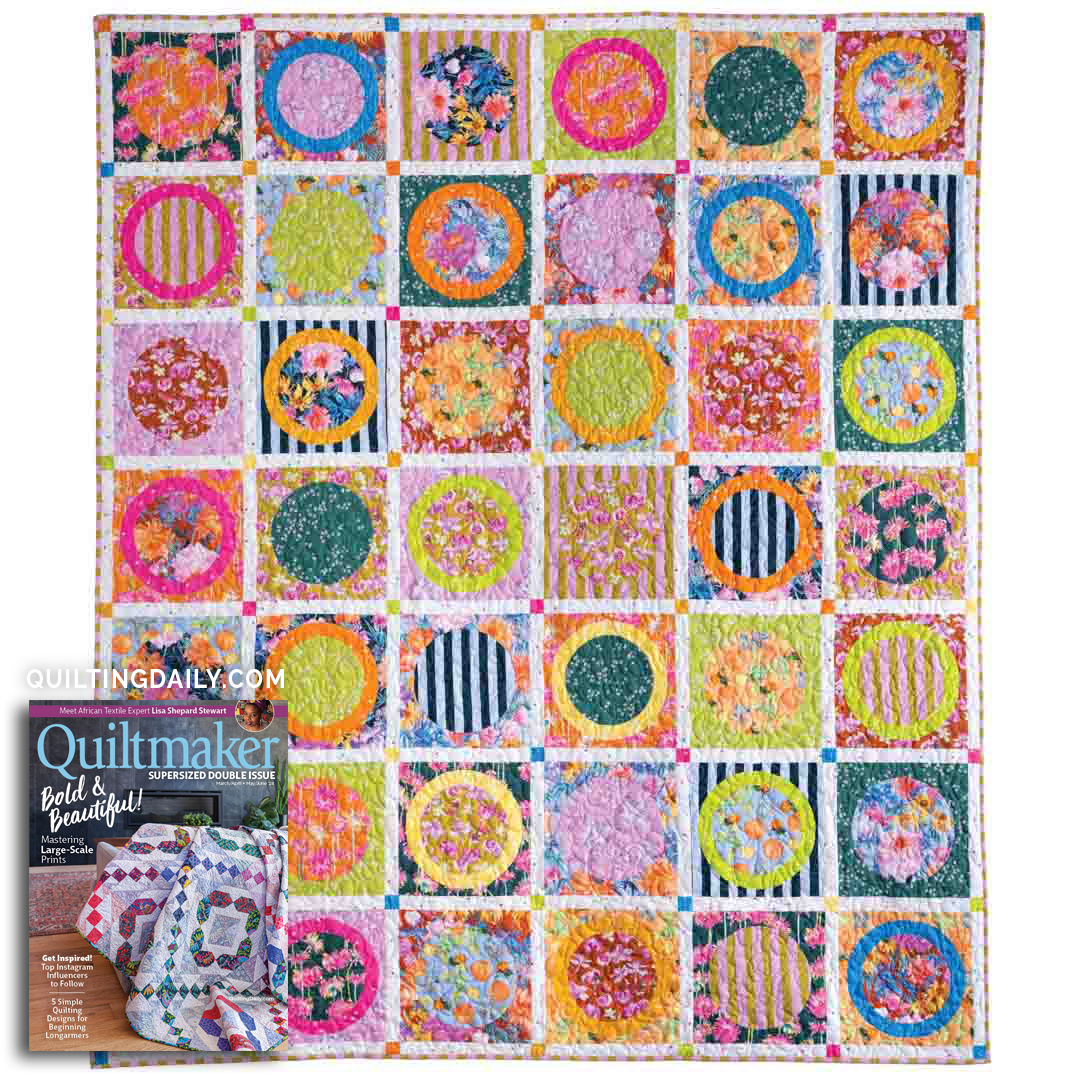
My finished Cirque de Fleurel quilt
So, about the circle blocks. They’re not that hard 😊! Really!! Think of it this way – each circle block has just one seam, and each ring block has only 2 seams. Yup – just 1 or 2 seams per block. Easy! It’s not fast sewing – you want to take your time – but, with only 1-2 seams, each block takes only 5-10 minutes. The first one will take double that, but they get much faster. Trust me 😊. Here are my best tips for you:
Tip #1 – mark each circle, ring and block background in 8’s by folding in ¼’s and creasing (or snipping 1/8” into the seam), then folding again to mark the 1/8’s. Four of the crease/snips will be on the straight of grain and 4 will be on the 45° bias.
Tip #2 – when pinning pieces together, check that the straight-of-grain creases/snips on one piece are matched with the straight-of-grain creases/snips of the other piece. You really don’t want to sew straight-of-grain parts to bias parts – trust me!
Tip #3 – sew with the circle on the bottom and the block frame (or ring) on the top. Keep those raw edges aligned with each other and also keep them aligned with the edge of your ¼” foot.
Tip #4 – if your machine has a “needle down” function, I encourage you to use it. Stop to re-adjust the 2 layers as often as necessary.
Tip #5 – If you’re pressing the seam toward the background (frame) piece, you’ll want to make small snips in the seam allowance of the background piece on the curved seam. Same goes if you’re pressing the inner ring seam toward the ring. Your block will lay flatter.
Tip #6 – press the ring blocks only once the background piece has been added. If you press them after adding the ring but before the background has been added, you may distort the ring ☹.
I cut my pieces out with scissors – my Karen Kay Buckley micro-serrated purple handle ones are the bomb!

I used my Karen Kay Buckley scissors but an Olfa circle cutter is a great option
Please cut exactly on the traced line. I traced the circle and ring onto template plastic and traced along the edge of the plastic onto the back of my fabric. If you have an Olfa rotary circle cutter, this would be an excellent opportunity to put it through its paces. I quilted my quilt with an allover design and a lovely variegated thread, using a rayon print from the Margo collection as my backing fabric – so soft and dreamy!
Cirque de Fleurel is featured on page 41 of the jam-packed March/April + May/June double issue of Quiltmaker. This fab issue hits newsstands today and includes 12 delicious projects with detailed instructions for each. I love Toby Lischko’s Lava Lamps and Ramona’s Scrappy Braid. There’s also a Q & A on African fabrics with expert Lisa Shepard Stewart, and Brenna Riley Gates’ Top Ten Tips for Fussy-cutting – ideal for large-scale prints! You can download a copy of the issue here for instant gratification.
To entice you to pick up your own copy of the magazine and give Cirque de Fleurel a whirl, FIGO Fabrics has given me a tile pack of Margo 10” squares to make your own quilt.

A 42-piece pack of Margo 10″ squares is up for grabs
Thanks, FIGO! For your chance to win this fab FIGO prize, please leave a comment below by April 6 telling me about your favorite curvy block that you’ve made or want to make. Do you love or hate blocks with circles/curves? Successes, struggles? I want to hear it. Please share your thoughts. I can’t wait to read them.
Thanks for reading 😊
Cheers,
Patti


 In other news, in the past 2 months I have had a lot of interest in my