
Fellow Quilters,
Today is a beautiful sunny day where I am. I do believe that Spring is finally here – when I took a quick walk around the block this morning, I saw a long row of glorious daffodils brightening the side of the road.
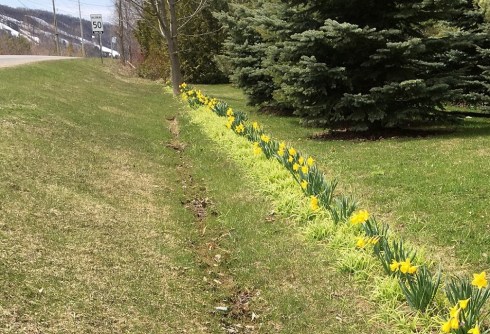
Spotted during my morning walk
Now, if you look in the upper left corner of this photo you will also see the snow-covered ski hills in our neighborhood, albeit with lots of brown patches. Hubby put his heavy winter boots away yesterday, also a sign that Spring is here.
I’m so excited about Time to Quilt Block 18 – I think you’re gonna love it! It is another great hack. I cannot take credit for this hack, however my online search for the clever creator of this split 9-patch came up blank. If you know who did, please let me know. Today’s pattern took a bit longer to write because I needed to do some extra diagrams and test my cutting instructions, but it is worth the wait. Let me show you 😊.

Block 18
For this block I did not follow the original instructions on Northcott’s, Banyan’s and FIGO’s Facebook page at all. Instead of cutting and sewing all those half-square triangle units I cut rectangles. Then I pieced each positive and negative block.

Sew the squares and rectangles together for the positive and negative blocks
Then I cut the blocks diagonally into 2 triangles each.

Then cut the blocks diagonally into 2 triangles
Today’s tip: So, to cut the block we measure ⅜” in from the right edge along the top, and ⅜” in from the left edge along the bottom, then make a 45° cut connecting these 2 spots. There are 2 super-easy ways to do this. The first one is to position your block on your cutting mat so that the 45° line on your mat (almost every mat has one) is running through both marks.

Align the 3/8″ marks with the 45 degree line on the mat and check that the block is square to the mat
Is your block square to the mat? Perfect! Make the cut. The other way method is to use a right-angle triangle ruler – we all seem to have a collection of them, so let’s use them. When I checked my ruler stash, sure enough I had 2.

The tip on my Omnigrid ruler shows me where to align it

My Easy Angle II ruler also has a marked tip to show where to align it.
The point of these rulers is marked with a line that shows you where to align the ruler to get the correct seam allowance on the tip of your patch.
Then I sewed a positive triangle to a negative triangle. Voila! The blocks are done!

Block 18 is done 🙂
Isn’t that the fastest easiest split 9-patch ever?!? Have fun with it!
Daphne has a slightly different way of assembling Block 18 on her blog today using some connector corners – pop over and check it out. And also check the Northcott or Banyan Facebook page to see if you were one of the 5 winners yesterday (personally I think you’re all winners 😊).
Have a great day and I’ll see you tomorrow with Block 19.
Cheers,
Patti


Leave a comment