
Fellow Quilters,
It snowed again last night! I’m glad I still have the snow tires on my car. Hubby and I live in a snowbelt and our auto insurance requires us to keep our snow tires on until April 15th. Almost every driver in our area has snow tires for the winter months. How many of you put snow tires on your vehicle each winter? How many of you do not get any snow in the winter? So, all this talk of snow leads us to our block today (what a great segue!).
Block 14 has snowball corners! There are no changes to the original cutting instructions found on the Northcott and Banyan Facebook pages, however I have some great tips for sewing the units and assembling the blocks.
This block takes more fabric than most because of those sew-and-flip snowball corners. Here are the pieces that I cut for the make-it-mini version – they are really small! I was not looking forward to sewing those corners.
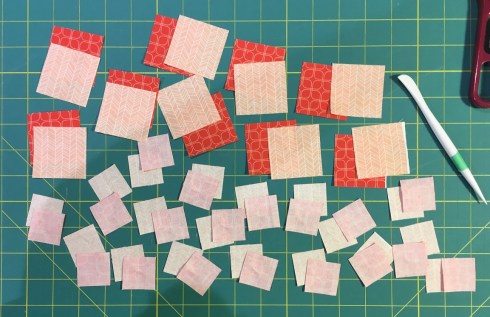
Soooo many tiny pieces in the make-it-mini version
Today’s tip: When we sew these corners, I find I get the best results if I sew 1 thread thickness to the RIGHT of my diagonal line instead of on the line.

Sew 1 thread thickness to the RIGHT of the diagonal line
This gives my corner fabric room to flip and still make it to the corner. I like to check that my triangle lines up perfectly with the original large square, then I trim the excess and finger-press it.

Check that the corner triangle lines up with the base triangle before trimming
I was going to share this tip later in the series however I thought you might appreciate having it now since there are 18 snowball corners in each block today (since I’m doing 3 versions, that means I had 108 snowball corners to sew).
Tip #2: I pressed both seams in each block toward ONE corner – this means that one of the snowball seams is pressed toward the center of the block. Why?!? Because when we assemble the units into rows, those seams will lock into each other and have a much better chance of matching.
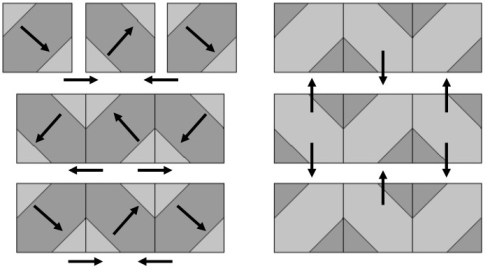
Press the seams in each unit toward ONE corner so they nest together, and press seams following arrows when sewing into rows
Tip #3: Follow the pressing arrows when you press the seams in each row. Originally I was going to press the seams in Rows 1 & 3 in one direction and the seams in Row 2 in the opposite direction but I changed my plan after I pieced the first block. If we press Rows 1 & 3 toward the center and Row 2 toward the ends, we can spin the seams at the intersections of the block units. See?

My mini block is perfectly flat because those 4 seam intersections spin
It makes the block lie perfectly flat! You will be so pleased with the result. Even my mini block is flat. And just like that the blocks are done!

Block 14 is done 🙂
You can find my instructions for Block 14 here.
Northcott is using the ethereal Swept Away collection for today’s block (I used this collection in my Panel Pizzazz pattern), and Banyan has used Patio by Pat Fryer of Villa Rosa – love the colors! Did you pop on over to Daphne’s blog yesterday? She had some great layout ideas for Block 13. I wonder what she’s done for today – check it out here.
Thanks sew much for playing along and I’ll see you tomorrow😊
Patti


Leave a comment