
Fellow Quilters,
Yesterday was not the best day. I am scrambling to get my Time to Quilt daily blocks done, write the pattern that includes the 3 size options and then get a blog post written to share the pattern with you. My goal is to get everything done at least a day in advance so the pattern is in your Inbox when you start your day, not at dinnertime. I’m hoping to be there by Sunday. Hubby says I’m like a mini tornado tearing around the house. Half-way through dinner last night I realized I had an epic fail on yesterday’s blog post. Did you have a hard time finding my instructions in my blog post yesterday? Of course you did, because I forgot to provide the link. So sorry! This is not supposed to be a “hide-and-seek” kind of thing – the download link is supposed to be quite obvious. Hubby says I need a checklist. Recently I watched a short TED talk video about the importance of checklists and how it reduced deaths during surgery by a whopping 47%. I now have a checklist. Guess what’s on the top of the list? Yup, include the pattern link. I updated yesterday’s post to include the link in not one but 2 places, and I am including it here as well. I’m also going to make it easy for you to find the daily download by placing it at the end of each post in a very obvious spot in addition to earlier references in the post. Now on to today’s block.

Block 3
Block 3 is a pretty 9-patch block with lots of sew-and-flip triangle corners.

Sew-and-flip corners
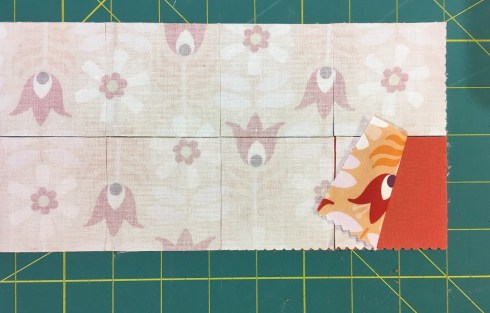
We place a square in the corner, sew diagonally through the square and trim away the excess fabric in the corner.
Easy peasy! The downside is that it wastes some fabric, unless we keep those trimmed-off corners for another project.
wasted trimmings
It’s a trade-off between accuracy/ease of construction and cost of fabric. When I was working on the calculations for the cutting of my 3 options, I used Northcott/Banyan/FIGO’s pattern for Block 3 as a starting point. The yardage requirements given are “fat ⅛yd or 6 inches”. As a rule, I use a size of 20” x 9” for a fat ⅛, and a size of 40” x 4½” for ⅛yd. I couldn’t cut the required pieces from either of these sizes. I needed a 6” x width-of-fabric strip. But I want to use a fat ⅛, so how can I squeeze the pieces out of it?

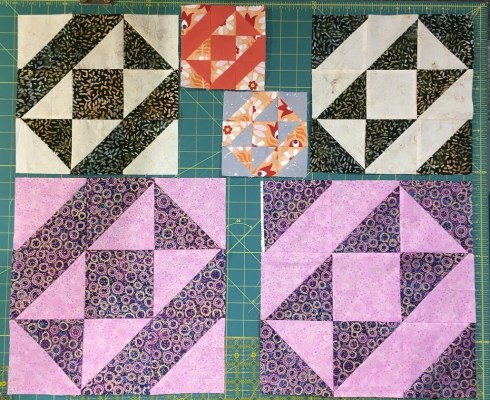
A square-in-a-square block replaces sew-and-flip corners in the center of Block 3
I re-gigged the center square to construct it from one smaller on-point square and 4 half-square triangles – a square-in-a-square – so my instructions are once again different than the Northcott, Banyan and FIGO ones on Facebook or Instagram. I also needed my fat ⅛ to measure 21” wide instead of 20”. Because I am using my Vino batiks, this wasn’t a problem. When I am using regular printed cottons, I occasionally use part of the white selvage for my seam allowance (I did this on my super-size Shimmer Block 1).

I used part of the selvage for my seam allowance in my Shimmer Block 1
I just don’t use ALL the selvage. The edge is where the tightness is, and I want to avoid that.
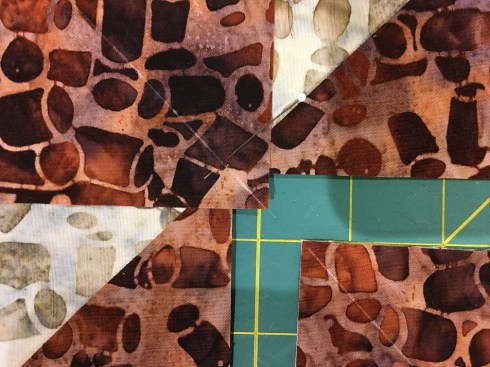
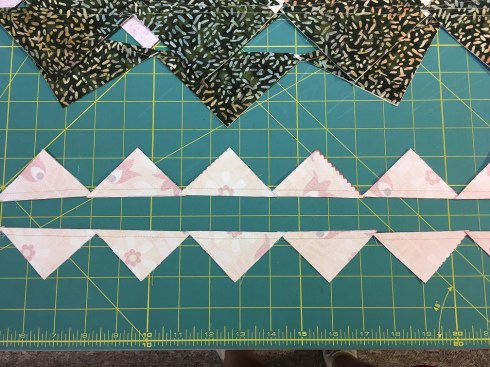
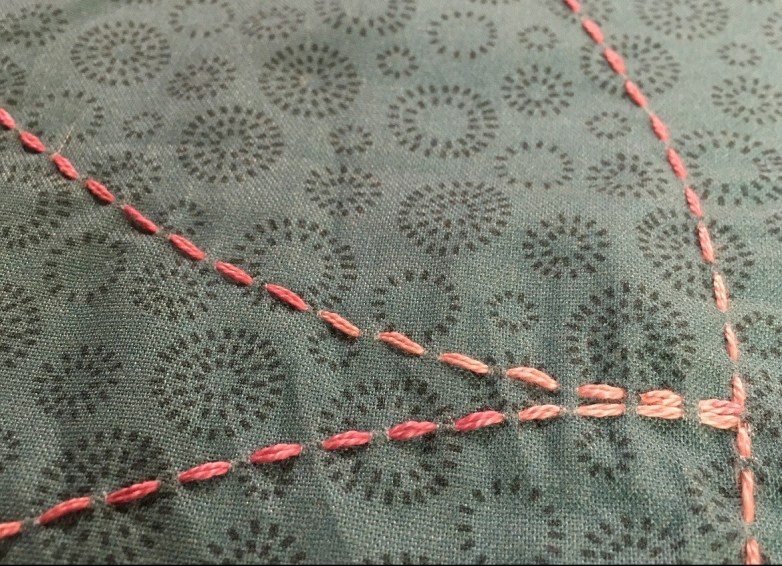
Today’s tip: When sewing the center square-in-a-square block, we align the corner triangles so that they extend ⅜” beyond the top and bottom edges of the square.

The upper and lower tips of the triangle extend 3/8″ beyond edges of square
Our ¼” sewing line starts and ends on the triangle, not at the edge of the block.

Sew with a 1/4″ seam
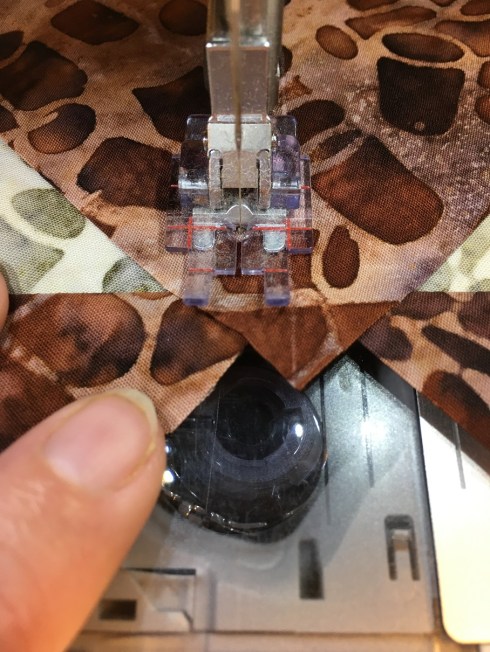
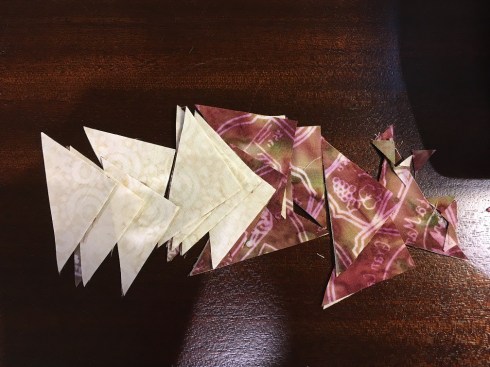
After adding triangles to opposite edges of the square, I finger-press my seams toward the triangles.

When adding the adjacent triangle it crosses the upper and lower triangles 1/4″ from the right edge for perfect placement.
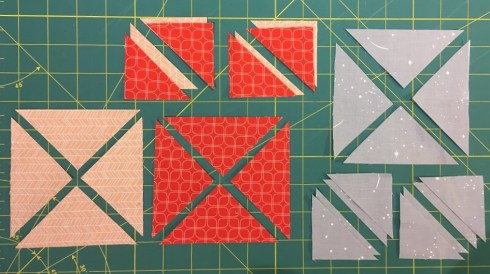
When I add the triangles to the remaining opposite edges, they are correctly aligned when they cross the previous triangles ¼” from the edge. We saw this with yesterday’s block – when 2 seams cross at opposite angles our ¼” seam goes right through the “V”. If we lay both triangle pieces on the square, the overlapped part in the center will be a square.

The overlapped part is square
If it’s a rectangle, one of the triangles isn’t correctly positioned.

The overlapped part is a rectangle – not good! The triangle on the right is too high.
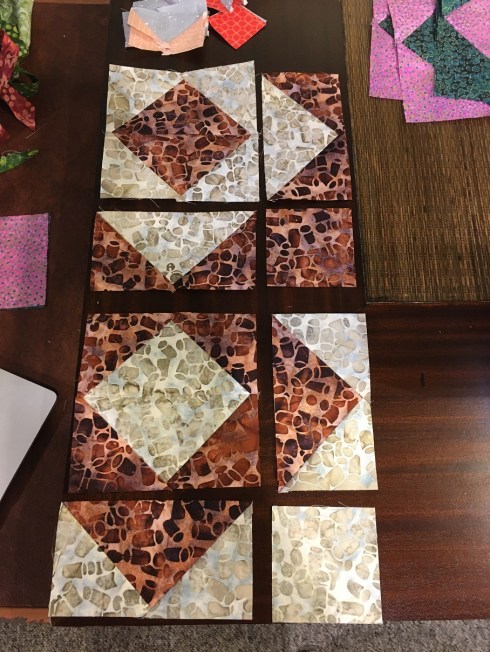
Here are my finished blocks. The Midsommar block units were SMALL! I slowed my sewing speed right down and took my time with them, and they came out perfect – yay😊

Block 3 is done!
As promised, here is the link to my multi-sized Time to Quilt Block 3.
I’ve got a short checklist for you today:
1) You’ll want to check out my friend Daphne’s blog post today too. She shares some great tips and some pretty layouts for quilts made with today’s block.
2) Share your best blocks for this week on Northcott or Banyan’s Facebook page or on Instagram, tagging FIGO, for a chance to win free fabric! Don’t forget to add #timetoquiltnorthcott, #timetoquiltbanyan or #timetoquiltfigo
We’ll see you back here tomorrow for Block 4. Have a great day!
Cheers,
Patti